Electric fencing is a practical way to contain livestock, manage grazing and protect crops, but faults can develop even in a well-installed system. Low fence voltage, intermittent power or a fence that has stopped working altogether can leave livestock boundaries less effective and need prompt attention.
Most electric fence faults can be traced back to a relatively small number of causes, including poor earthing, vegetation touching the fence, damaged insulators, faulty connections or problems with the energiser. Working through the system methodically is usually the quickest way to find the cause.
In this guide, we look at common electric fence problems, how to identify where the fault lies and the practical checks you can make to get your fencing working correctly again.
Before replacing components or inspecting the entire fence line, check the voltage with a suitable electric fence tester. This can confirm there is a problem and help narrow down where the fault is occurring.
Start by testing close to the energiser, then work your way along the fence. If the voltage is good near the energiser but drops further along, inspect the affected section for vegetation touching the fence, damaged insulators, broken conductors or poor connections.
A digital fault finder can make this process quicker on larger fencing systems by helping locate the direction of a fault. Once any problems have been corrected, test the fence again to check the voltage.
Never test an electric fence by touching it with your hand. Always use a suitable electric fence tester and follow the instructions provided with your equipment.
If your electric fence isn't producing a shock at all, start with the power source. It sounds obvious, but checking the basics first can save considerable time.
For a mains-powered electric fence energiser, check that it is switched on and receiving power. Look for tripped circuit breakers, damaged cables, loose connections or blown fuses where applicable.
For a battery-powered system, check the battery's charge level and inspect its terminals for corrosion or loose connections. Batteries naturally lose charge over time, and cold weather can also affect their performance.
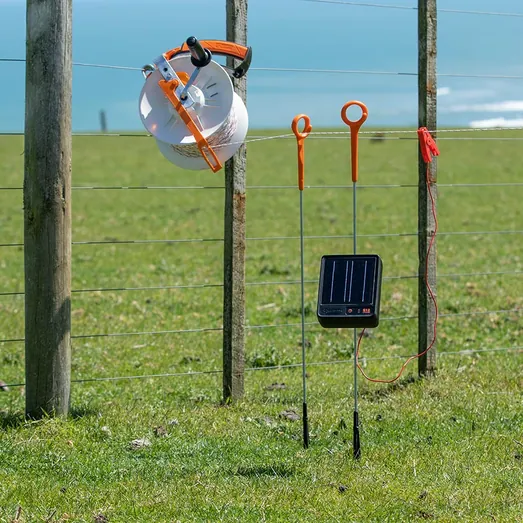
If you're using a solar electric fence energiser, make sure the solar panel isn't obstructed by dirt, leaves or vegetation and that it receives sufficient sunlight. You should also check the battery, as a solar panel may be functioning correctly while the battery itself is no longer holding an adequate charge.
A fence tester is particularly useful here. Test the voltage close to the energiser first. If there is already little or no voltage at this point, you can concentrate your troubleshooting on the energiser, power supply and initial connections rather than inspecting the entire fence.
A fence doesn't have to stop working completely to have a problem. Low voltage is one of the most common electric fence issues and can make the boundary significantly less effective.
Start by testing the voltage at several points along the fence line. A substantial voltage drop between two locations can help narrow down where the fault is occurring.
Common causes of low electric fence voltage include:
Work methodically rather than changing several components at once. Begin near the energiser and move along the fence, testing at intervals. This makes it much easier to identify where performance starts to deteriorate.
Grass, weeds, hedges and overhanging branches are frequent causes of electric fence faults.
When vegetation comes into contact with an electrified conductor, some of the electrical pulse can leak away instead of travelling effectively around the fence. A small amount of contact may have a limited effect, but dense or wet vegetation touching the fence in multiple places can cause a noticeable loss of performance.
Regular fence-line maintenance is therefore important.
Cut back grass and weeds beneath the fence and trim shrubs, branches and other growth that could reach the conductors. Pay particular attention during spring and summer when vegetation grows quickly.
After clearing the fence line, test the voltage again. If it rises substantially, vegetation was likely responsible for at least part of the problem.
Electrical leakage occurs when current is able to escape from the fence through an unintended path. This can reduce fence voltage significantly and, in more severe cases, leave the fence with very little effective power.
Potential causes include broken insulators, conductive material touching the fence, damaged underground cables or a live conductor making contact with an unelectrified metal object.
Walk the entire fence line and look closely for anything unusual. Check for:
Listen as you inspect the fence, too. In some conditions, a significant fault can produce a regular clicking or snapping sound as electricity arcs to another object.
Replacing a damaged insulator or repairing a poor connection can sometimes restore the fence immediately.
A good earthing system is essential to electric fence performance.
An electric fence works as part of an electrical circuit. When an animal touches the live fence while standing on the ground, the electrical pulse travels through the animal and soil before returning through the earth system to the energiser.
If the earthing arrangement is inadequate, the fence may still show voltage but deliver a weaker shock when an animal makes contact.
Check that earth stakes and their connections are secure and free from excessive corrosion. The appropriate number, length and spacing of earth stakes will depend on the energiser, installation and ground conditions, so follow the energiser manufacturer's instructions.
Ground conditions matter as well. Very dry, sandy or frozen soil can make effective earthing more difficult and may require a different or enhanced installation.
If you're unsure whether the earthing system is adequate, don't simply assume the energiser is faulty. Earthing is one of the most important areas to investigate when troubleshooting weak electric fence performance.
Electric fence conductors are exposed to weather, animals, vegetation and physical tension throughout their working life. Eventually, damage can occur.
Electric fence tape can fray, rope can become worn and wire can snap or corrode. Conductive strands within tape or rope may also break even when the material hasn't completely separated.
Inspect the conductor closely, particularly around corners, gateways and joins where additional stress is common.
Where a repair is needed, use suitable electric fence connectors rather than simply knotting tape or rope together. Proper connectors help maintain electrical continuity and provide a more secure mechanical connection.
If a conductor is extensively worn or has suffered repeated repairs, replacement may be more reliable than continuing to patch individual sections.
Electric fence insulators prevent the live conductor from transferring electricity into fence posts and other structures. When they crack, become damaged or are installed incorrectly, they can cause significant power leakage.
Check insulators for visible cracks, UV degradation and signs of electrical tracking or arcing.
It's also important to use the correct type of insulator for the fence construction and conductor. An insulator designed for wire, for example, isn't necessarily suitable for wide electric fence tape.
Corners and changes of direction deserve particular attention because the conductor places additional mechanical pressure on these points. Appropriate corner and strain insulators can help create a more durable installation.
Sometimes there isn't a single fault at all — the energiser simply isn't suitable for the job it's being asked to do.
Electric fence energisers vary considerably in output and intended application. The appropriate choice depends on factors including fence length, number of electrified strands, vegetation pressure, livestock type and general installation conditions.
Remember that the total amount of conductor can be considerably greater than the physical boundary length. A one-kilometre fence with four electrified strands, for example, contains approximately four kilometres of conductor before connections and other parts of the system are considered.
When choosing or replacing an energiser, check its specifications carefully and consider the actual fence conditions rather than relying solely on a quoted maximum fence length.
When an electric fence isn't performing correctly, a systematic approach is usually faster than inspecting components at random.
Start by testing the energiser and power supply. Then test the fence close to the energiser before gradually moving further along the fence line.
If possible, isolate different sections of a larger fencing system. Disconnecting sections one at a time can help identify which part of the fence contains the fault.
Pay particular attention to common problem areas such as gateways, joins, corners, underground cables and locations with heavy vegetation.
Most importantly, use a suitable electric fence tester. Being able to measure fence performance is much more reliable — and safer — than attempting to judge the strength of a fence by touching it.
Regular checks can help you spot small issues before they begin to affect the performance of your electric fence. Test the fence voltage periodically, particularly after bad weather, maintenance work or changes to the fence setup.
Keep grass, weeds and overhanging branches clear of live conductors, and inspect the fence line for damaged insulators, loose connections and worn or broken wire, rope or tape. Gateways and connection points are also worth checking as part of your routine maintenance.
Check the earthing system periodically and, for battery or solar-powered setups, keep an eye on battery condition and charge. If you make any repairs or adjustments, test the fence afterwards to make sure everything is working as expected.
Most electric fence faults can be traced back to a handful of common causes, including power supply problems, poor earthing, vegetation, damaged conductors, faulty insulators and poor connections.
A methodical approach is usually the quickest way to find the problem. Start at the energiser, use a suitable fence tester and work along the installation until you identify where the voltage drops or the fault occurs.
Regular testing and maintenance can also help identify smaller problems before they begin to affect the wider fence system.
Explore our range of electric fence essentials, including fence testers, insulators, conductors, earthing equipment and energisers, to help maintain and troubleshoot your electric fencing system.