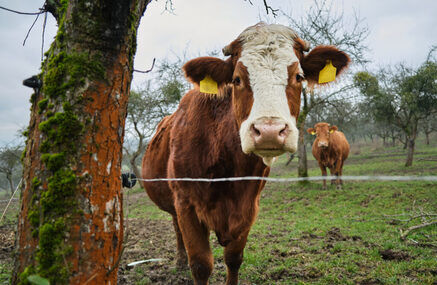
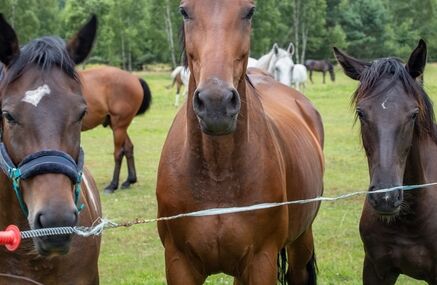
Strip grazing can be an effective way to manage grazing pressure and control livestock access to fresh forage. Temporary electric fencing makes this approach practical, allowing fence lines to be moved as grazing progresses and fields to be divided into manageable sections.
Whether you're introducing strip grazing for the first time or looking to improve an existing system, choosing the right electric fencing equipment and setting it up correctly can make regular fence moves quicker and day-to-day grazing management easier.
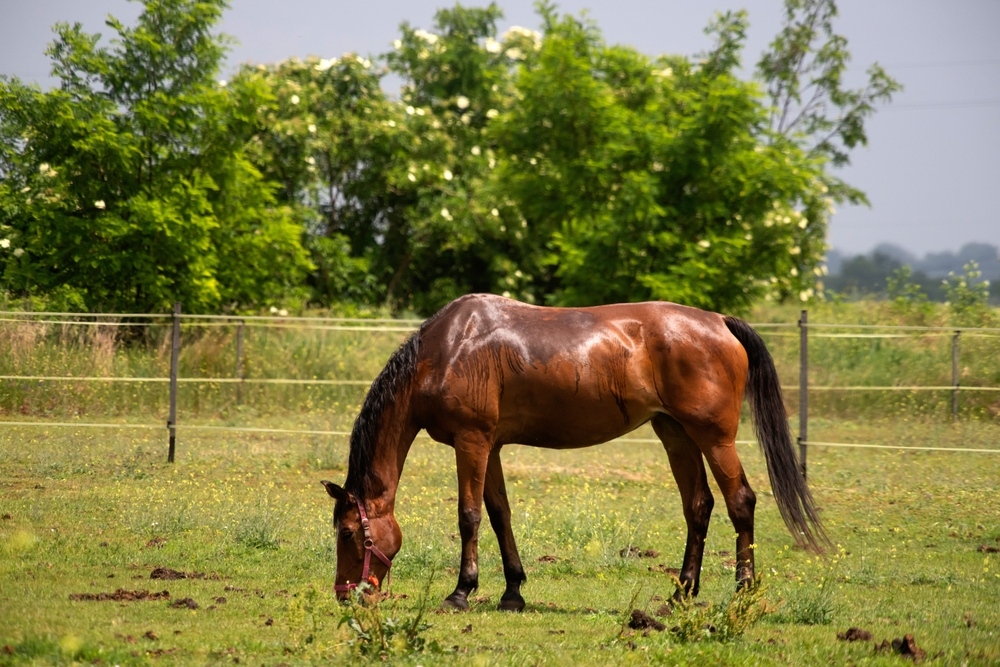
Strip grazing involves dividing a larger grazing area into smaller sections, or "strips", and allowing livestock access to a controlled amount of fresh forage at a time.
Rather than giving animals unrestricted access to an entire field, a temporary fence creates a boundary that can be moved forwards as grazing progresses. This gives the farmer greater control over the area available to livestock and the grazing pressure applied to it.
Electric fencing is particularly well suited to this approach because temporary fence lines can be repositioned relatively quickly. AHDB highlights strip grazing as one of the applications for electric fencing and notes that temporary systems allow stocking density and grazing pressure to be controlled.
Strip grazing isn't limited to conventional grass pasture either. It can form part of rotational grazing systems and can also be used when grazing certain forage crops.
Strip grazing gives farmers greater control over how livestock access available forage. By allocating a smaller area at a time, grazing pressure can be managed more closely and livestock access can be adjusted as conditions change.
It can also help improve forage utilisation by reducing the opportunity for livestock to selectively graze preferred areas. When grazing suitable forage crops, AHDB notes that smaller allocations can help improve utilisation and reduce losses from trampling.
Temporary electric fencing makes these divisions relatively quick to create and adjust, allowing the grazing area to change without installing permanent internal boundaries.
Flexibility is where electric fencing really comes into its own.
A permanent stock fence has an important role around field boundaries, but repeatedly constructing permanent fences across a grazing area would be impractical. A temporary electric fence can instead be erected, moved and reused as required.
An electric fence works by sending pulses of electrical current along a conductive fence line. When an animal touches the live fence and completes the circuit through the ground, it receives a short shock that discourages further contact. Electric fencing works primarily by teaching livestock to respect the fence line rather than relying on the physical strength of the fence itself.
For strip grazing, this means relatively lightweight equipment can be used to create a boundary livestock learn to respect.
Before choosing your electric fencing equipment, consider how the strip grazing system will work in practice. The layout will affect the amount of conductor required, the number of posts you need and where the energiser and other equipment can be positioned.
Think about the size and shape of the grazing area, where livestock will enter and leave each strip and how they will access water. Slopes, uneven ground, gateways and other obstacles should also be considered when planning the fence route.
It is also worth deciding how frequently the fence will move and whether you intend to use both a front and back fence. If the system will be moved regularly, lightweight posts, suitable reels and easily handled conductors can make routine moves considerably easier.
Planning these points first makes it easier to choose equipment that suits the livestock, land and way you intend to manage the grazing area.
A dependable system is about more than simply putting up a strand of electric wire.
The core components of an electric fence include an energiser, earthing accessories and a conductor. For a temporary strip grazing system, you'll also usually require suitable temporary posts, reels and insulators.
The energiser is at the heart of the system. It supplies the electrical pulses to the fence line.
The right energiser will depend on factors including the length of fencing, number of fence lines and the conditions in which it will operate. Depending on the location and system, mains, battery and other suitable power options may be available.
Temporary electric fence posts allow you to create and reposition the grazing boundary.
Because strip grazing may involve frequent fence moves, lightweight and easy-to-handle posts can save considerable time. However, they still need to hold the conductor at a suitable height and remain secure enough for the conditions.
The conductor needs to carry the electrical pulse effectively while remaining practical for the way the fence will be used. For strip grazing, ease of handling can be particularly important because the fence may be moved frequently.
Polywire is lightweight and convenient to wind onto a reel, making it a practical option for many temporary fencing systems. Polytape provides a wider, more visible fence line, although its width and exposure to wind should be considered when choosing posts and planning the layout. Electric rope is more substantial than lightweight polywire and may suit some temporary or semi-permanent applications.
The right conductor will depend on the livestock, fence length, visibility required and how frequently the fence needs to move. Check that the conductor, posts, connectors and energiser are suitable for use together rather than choosing each component separately.
A good reel can make setting up, taking down and moving a temporary electric fence considerably easier. Rather than manually gathering lengths of conductor, the fence can be wound back onto the reel ready for the next strip.
Gate handles, connectors, insulators and fence testers are other relatively small components that can make a big difference to how practical and reliable the overall system is.
In a strip grazing system, the front fence controls livestock access to the next area of fresh grazing. As grazing progresses, this fence can be moved forwards to provide the next allocation.
Depending on the grazing plan, a second temporary fence can be positioned behind the livestock to restrict access to previously grazed areas. This is commonly referred to as a back fence.
Not every strip grazing system will require one, but including a back fence in your plan will affect the amount of equipment needed. You may require additional temporary posts, conductor, reels and gate handles to manage two movable fence lines efficiently.
Once you have planned the layout, position the temporary posts along the required fence line and run your chosen conductor through the appropriate clips or insulators. Keep the conductor properly supported and sufficiently tensioned without placing unnecessary strain on the posts or fittings.
Connect the fence to a suitable energiser and correctly installed earth system, following the manufacturer's instructions for the equipment being used. Before allowing livestock into the grazing area, test the fence with a suitable electric fence tester to check that it is operating correctly.
The number, position and visibility of fence strands will depend on the animals being managed, so avoid assuming that one strip grazing setup will suit every type of livestock.
AHDB guidance, for example, notes that a single strand can be suitable for adult cattle in some circumstances, while cattle with calves may require a different arrangement. Temporary electric fencing for sheep can require additional strands depending on the animals and system being used.
Treat livestock-specific configurations as a starting point rather than a universal rule. Consider the type and age of the animals, the particular grazing situation and the equipment being used, and follow relevant livestock guidance and the fencing manufacturer's recommendations when deciding how the fence should be configured.
How frequently the fence needs to move will depend on livestock numbers, forage availability, weather and your grazing objectives. When strip grazing suitable forage crops, AHDB advises that the fence should ideally be moved daily and that long, narrow strips should still provide enough room for all animals, including more timid individuals, to access the crop at the same time.
If the fence needs to move regularly, ease of handling becomes an important consideration. Reels allow conductor to be paid out and collected efficiently, while lightweight temporary posts are easier to reposition around the field. Keeping conductor properly wound and equipment organised can also reduce tangles and make subsequent moves quicker.
Avoid making the temporary layout unnecessarily complicated. A straightforward fence route with manageable lengths of conductor can make routine moves easier, provided it still suits the livestock, terrain and grazing plan.
After repositioning the fence, check the posts, conductor and connections, then test the fence before allowing livestock access to the new grazing area.
An electric fence is only useful if it is working effectively, so regular checks are essential.
Vegetation touching the fence can reduce its performance, particularly when wet. Keeping the fence line clear can therefore help maintain an effective pulse.
Poor earthing is another common source of problems. The energiser needs an effective earth system for the fence to work correctly.
You should also look for damaged insulators, broken conductors, loose connections and sections where the fence has sagged or become difficult for livestock to see. AHDB identifies poor earth connections, vegetation interference and broken insulators among the common electric fencing pitfalls.
Using an electric fence tester makes it much easier to check that the system is operating correctly rather than simply assuming the fence is live.
A good electric fence works because animals learn to respect it, so introducing livestock to electric fencing correctly is important.
AHDB recommends training cattle and sheep before relying on electric fencing as their main barrier and suggests using an existing permanent stock fence to provide a controlled training area.
Once animals understand the boundary, managing temporary grazing divisions can become considerably easier.
Electric fences should always be properly designed, installed and maintained. UK livestock welfare guidance states that electric fencing should cause no more than momentary or slight discomfort, and specific considerations apply to different livestock; for example, government guidance says electric mesh fencing should not be used for horned sheep.
The exact equipment required will depend on your livestock, grazing layout and available power source, but a typical temporary strip grazing system may include:
Check that the individual components are compatible and suitable for the complete fence rather than selecting them in isolation.
There isn't a single electric fencing setup that will suit every farm.
Before choosing equipment, consider:
For a system that will be moved frequently, practicality matters. Lightweight posts, suitable reels and easily handled conductors can make routine fence moves considerably less labour-intensive.
At the same time, don't choose equipment purely because it is easy to move. Reliable conductivity, good earthing and an energiser suited to the fence are fundamental to a system that livestock will respect.
Choosing electric fencing for strip grazing starts with understanding how the system will be used. Consider the livestock, grazing layout, total fence length, available power source and how frequently the fence will need to move before selecting equipment.
For regularly moved fences, practical features such as lightweight posts, suitable reels and manageable conductors can make day-to-day grazing changes easier. These still need to form part of a properly powered, earthed and maintained electric fencing system.
Test the fence regularly and check posts, conductors, connections and vegetation as the system moves around the grazing area. A well-planned setup should be straightforward to adjust as grazing requirements change throughout the season.
Explore our range of electric fencing equipment for temporary fencing and strip grazing systems.